NextJS Website Editing Guide
This guide covers updating team details and adding impact reports to the website.
Prerequisites
- VS Code installed
- Understanding of React and/or NextJS
- Basic GitHub and Git knowledge
- Repository link
Step 1: Clone the Repository & Open in VS Code
-
Open your terminal and clone the repository:
git clone <repository-link> -
Open the project folder in VS Code.
-
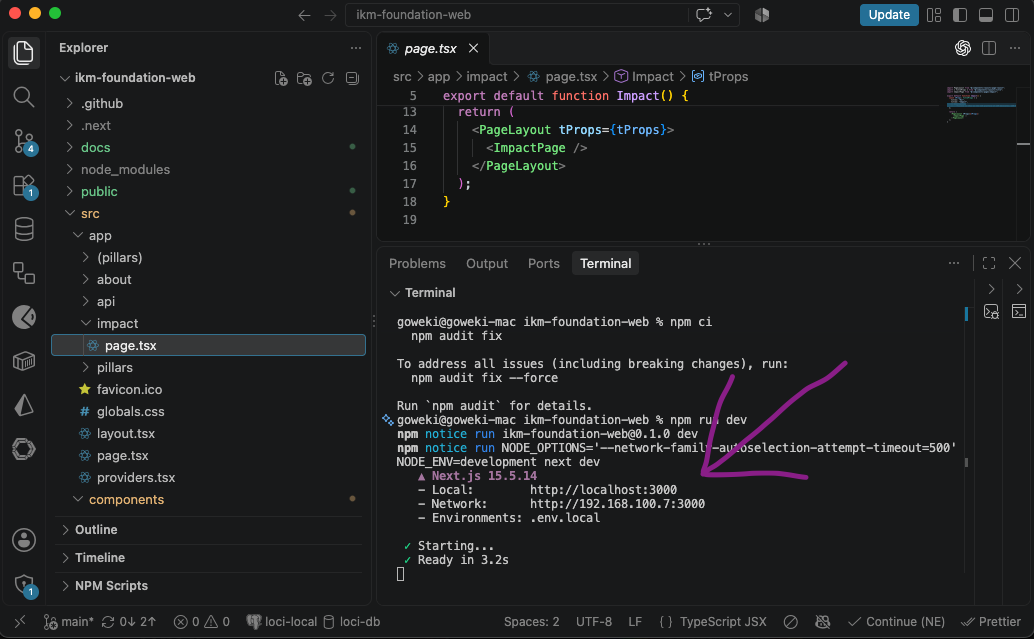
Install dependencies and run the development server:
npm cinpm run dev -
Open
http://localhost:3000in your browser to view the site.
Step 2: Handle Assets (Photos & Reports)
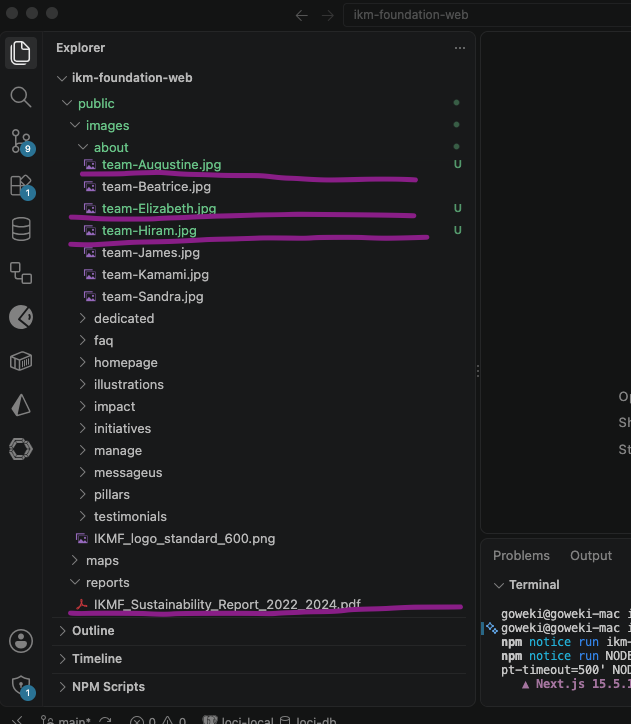
- Drop the new CSR Committee Photo into the public assets folder (e.g.,
public/images/about/). - Drop the new Sustainability Report PDF into the documents folder (e.g.,
public/reports/).
Step 3: Update the Team Section
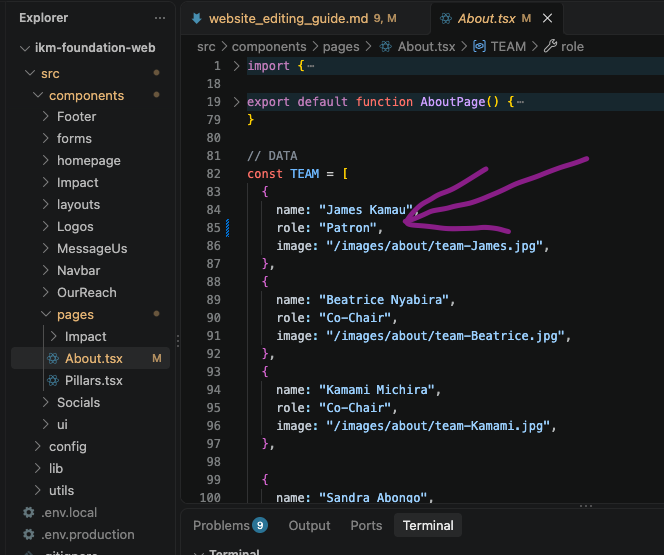
- Locate the component with the data (team component:
src/components/pages/About.tsx). - Open the file and find James's entry to update his title.
// Example Data Structure
{
  "name": "James Smith",
  "title": "Patron", // Updated from Managing Partner
  "image": "/images/team-James.jpg"
}
Add CSR Committee Member
- Add a new object to the team array with the new member's details and the uploaded photo path, setting their appropriate title.
{
  "name": "Jane Doe",
  "title": "CSR Committee Member",
  "image": "/images/team/csr-new-member.jpg"
}
Step 4: Update the Impact Section (Annual Reports)
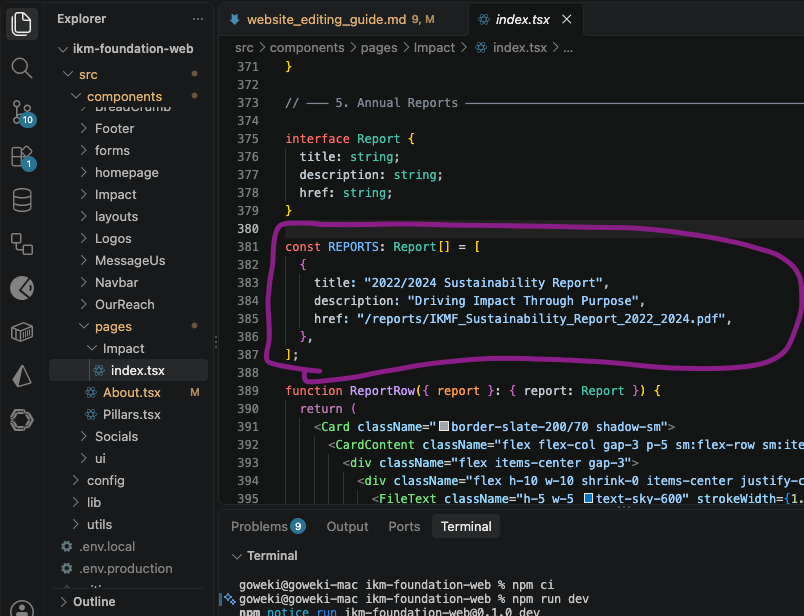
- Locate the Impact component:
src/components/pages/Impact/index.tsx. - Add a new entry for the Sustainability Report, linking to the PDF file you placed in the
publicfolder.
// Example Reports Array
{
  "title": "2022/2024 Sustainability Report",
  "description": "Driving Impact Through Purpose",
  "href": "/reports/IKMF_Sustainability_Report_2022_2024.pdf"
}
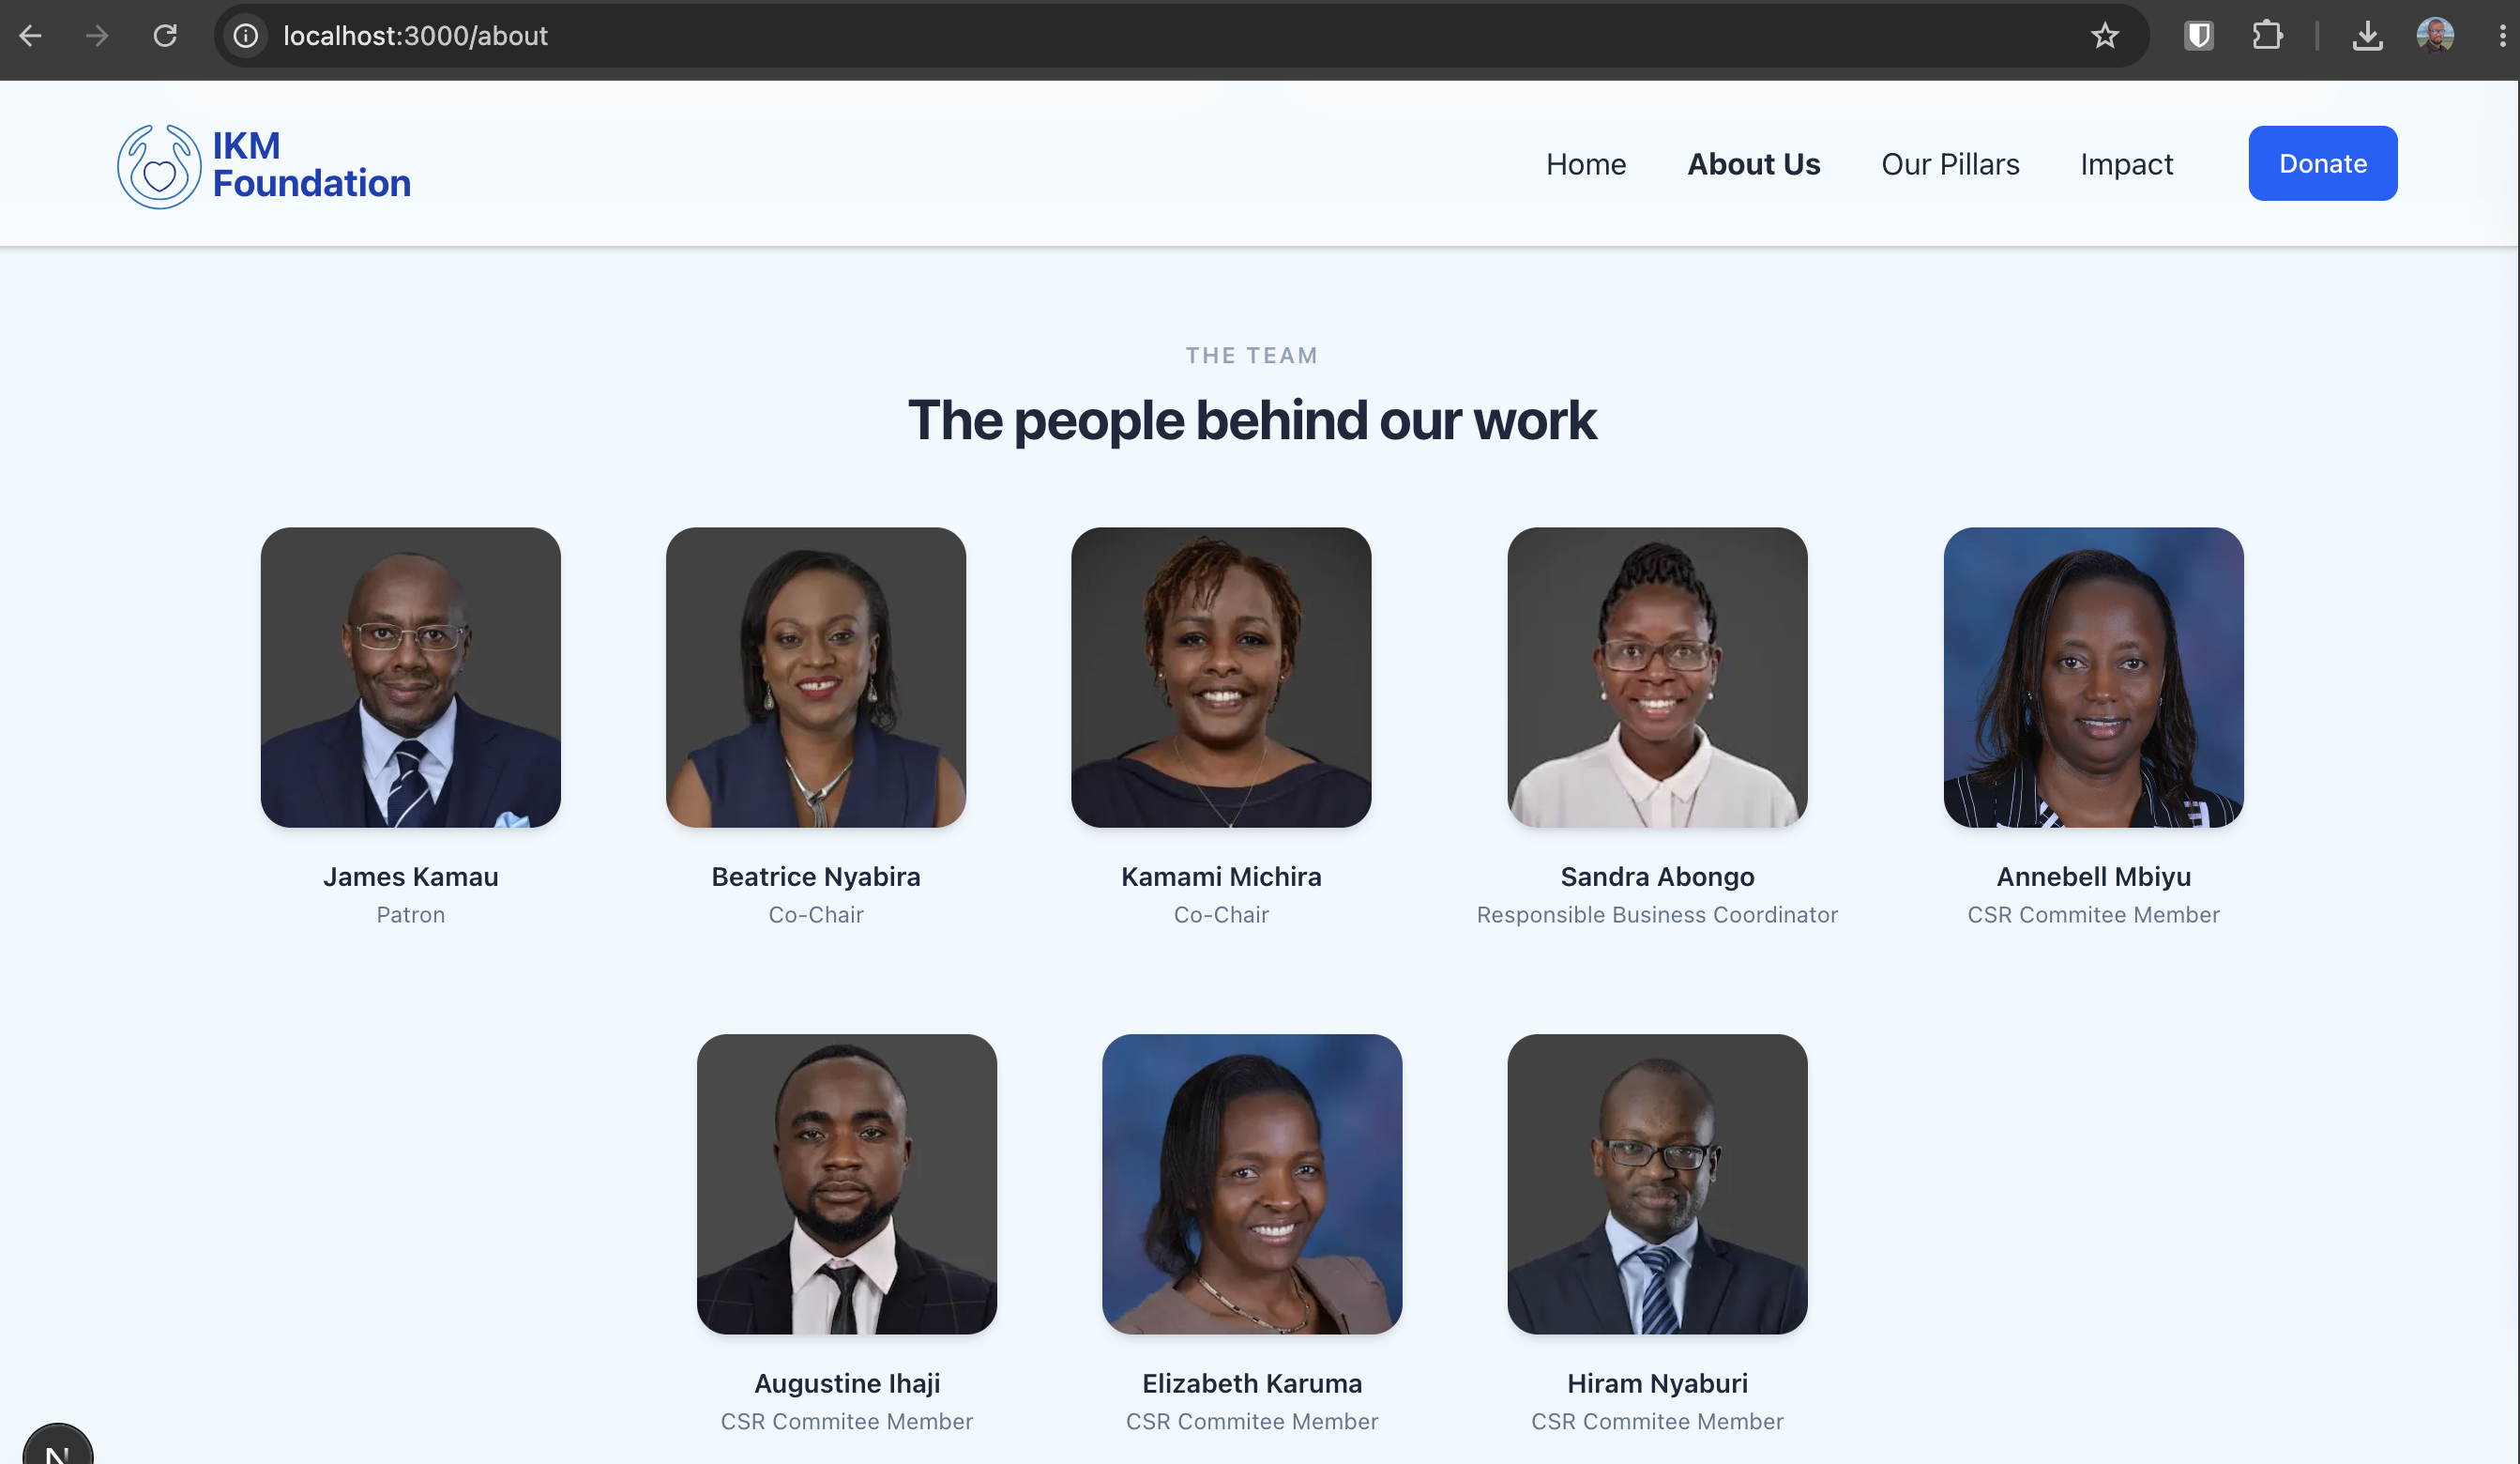
Step 5: Test Locally
- Check your local browser preview (
http://localhost:3000) to confirm:- James's title reads "Patron".
- The new CSR Committee member is visible with their photo and title.
- The Sustainability Report is downloadable/accessible under the Annual Reports section.
Step 6: Commit and Push Changes to Update Codebase
-
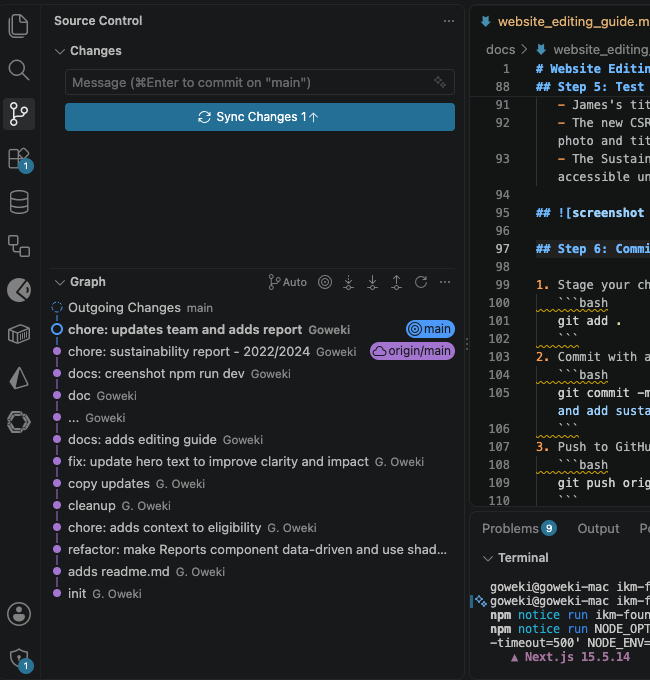
Stage your changes in git:
git add . -
Commit with a clear message:
git commit -m "Update team titles, add CSR member, and add sustainability report" -
Push to GitHub to deploy:
git push origin main
Step 7: Build website
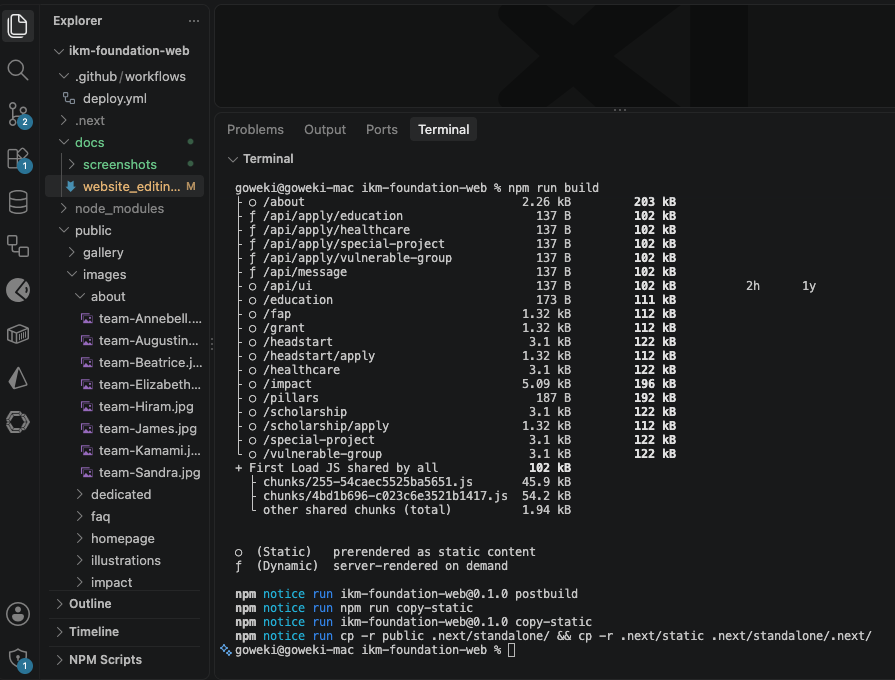
Build project for production:
npm run build
Step 8: Prepare the deployment files
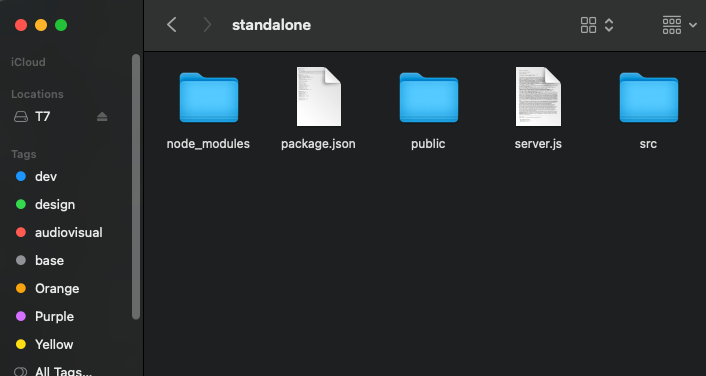
- Open the generated
.next/standalonefolder. - Select its contents, including
server.jsand any asset folders. - Compress the selected contents into a ZIP file.
Ensure that server.js is at the root of the ZIP archive, not inside an additional sub-folder.
Step 9: Upload and extract the build
- Log in to your hosting provider's cPanel.
- Open File Manager.
- Navigate to the website's document root, in this case:
public_html/website. - Back up the existing website files before replacing anything.
- Upload the ZIP file to the website's document root.
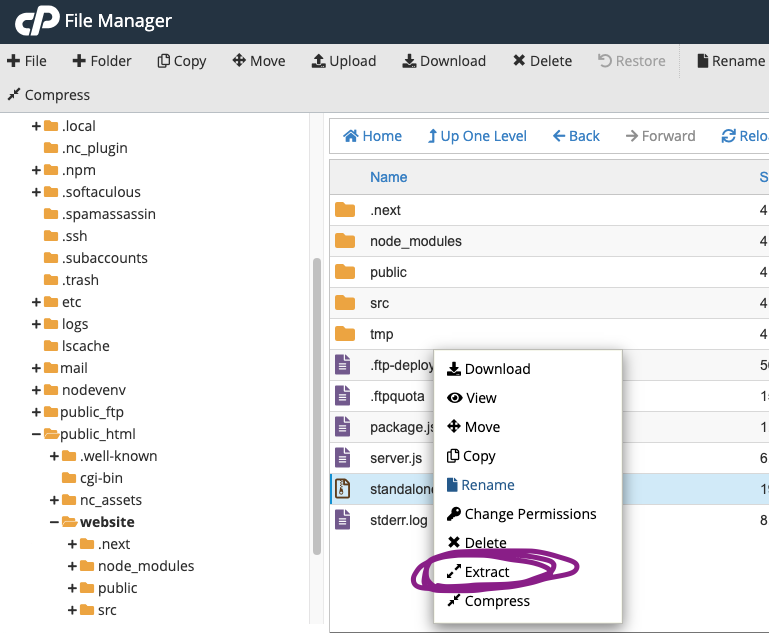
- Select the ZIP file and click Extract.
- Confirm that
server.jsand the asset folders are directly inside rootpublic_html/website. - Remove the ZIP file after verifying the extraction, if it is no longer needed.
Step 10: Verify the deployment
Note: Changes may take up to 6 hours to be available online due propagation
- Open the website in a browser.
- Check the updated content and images.
- Test navigation and internal links.
- Check the browser console for errors.
- Test the website on both desktop and mobile.
If the previous version still appears after a day, clear the browser cache and check whether a CDN or hosting cache needs to be cleared.